Little Explorers: Homemade Chalk
- Little Explorers
Summer made a happy appearance at the weekend so we’ve been spending every possible minute outside. We couldn’t find last year’s pavement chalks so we set about making our own. It doesn’t take long and it’s always rewarding to do an activity that will actually save you money!

You will need:-
- Silicon cake moulds or waxed paper cups
- Plaster of Paris
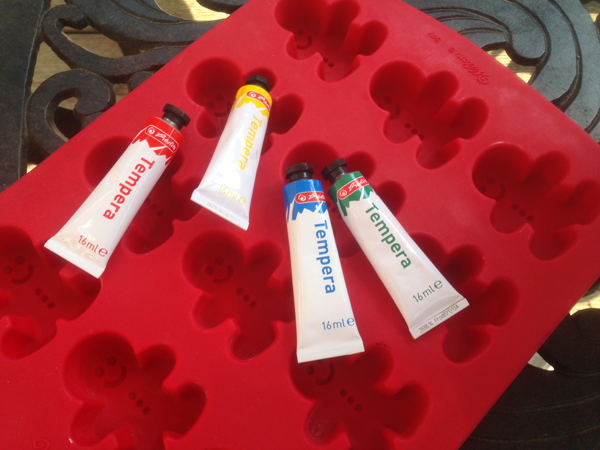
- Tempera paint
- Sandwich bags
- A glass container
You may have to source the tempera paint and Plaster of Paris specially, but because these are such useful bits to have in the craft cupboard, you’ll definitely get your money’s worth. They can be brought out time and again. And a well-wrapped set of homemade chalks makes a cool birthday present for friends too.
Speed is of the essence here, otherwise your concotion might set firm before you’re ready! So, measure out your ingredients Blue Peter-style and get ready to mix! We found doing it colour by colour was the least daunting method.
In a glass container, mix up:-
- ¼ cup of warm water
- 1/2 cup of Plaster of Paris
- A good squirt of Tempera Paint


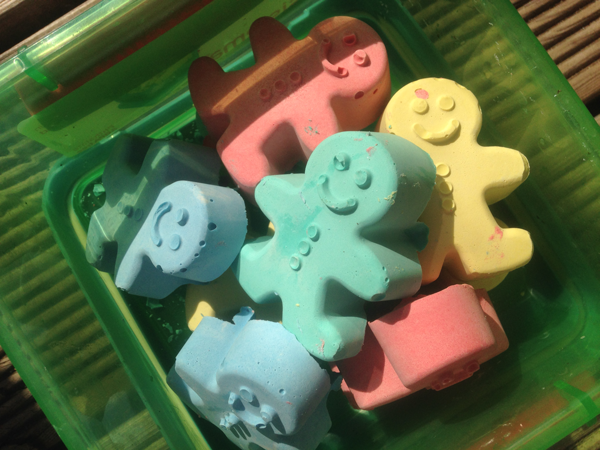
Get mixing! You’ll need the mix to be smooth and thick, with no lumps. Be ready because it will start setting in just a few minutes. Once the mixture is well mixed, pour into a sandwich bag and snip a tiny corner off the base. You can use this as a piping bag to neatly fill up your moulds. If you don’t want to waste the bags, simply spoon it in to the moulds as neatly as possible. Let it set until it is rock solid – ours only took a few hours to be fully hardened off.


Make sure you don’t slosh any of the remainder down the sink – your plumber will thank you for it, but your wallet won’t! If you’ve mixed it in a glass container you can simply wipe any residue away with a paper towel or old newspaper.
When ready, pop out the chalks from their silicon mould, or peel off the waxed paper cup, and get arty!


Another good thing about pavement chalk is that the rain will wash away your Little Explorer’s artwork, so you can let them go wild with it. A free reign environment is fantastic for letting their creativity soar. If it doesn’t rain, a bucket of water and a stiff brush will do the job and that can be fun too.

Expert Explorers: Did you know that real chalk is mainly made from the skeletons of billions of tiny planktonic agae called coccoliths? It was laid down in the Upper Cretaceous period – the last time dinosaurs roamed the earth – between 100 million and 66 million years ago!
If your garden has chalky soil, dig around until you find a lump and claim it as your own piece of history! Blackboard chalk is not real chalk, but gypsum. These days, interactive whiteboards have pretty much wiped out blackboards in schools in the UK!